MCP Client Setup
This guide provides step-by-step instructions for connecting popular MCP clients to Mission Control.
Prerequisites
Before connecting any client, you'll need:
-
MCP Server URL
- SaaS users:
https://mc.<org-id>.workload-prod-eu-02.flanksource.com/mcp - Self-hosted users:
https://your.domain.com/api/mcp
- SaaS users:
-
Authorization Token
- Create a token with
mcp.*permissions in Mission Control - Navigate to Settings → API Tokens → Create New Token
- Select "MCP" permissions scope
- Create a token with
The authorization token is a Basic token with credentials - user: token & password: <token value>
Hence, it needs to be encoded to base64(token:<token_value>) when using the Authorization: Basic <base64_token> header.
Creating a token
To generate a token for MCP, a setup wizard is available.
Click on the user avatar and choose "Setup MCP"

Choose the name for the token
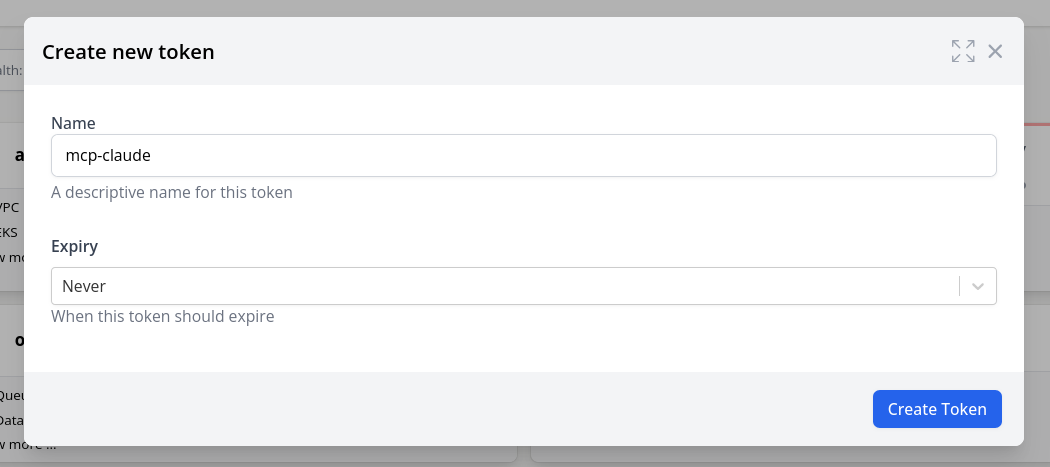
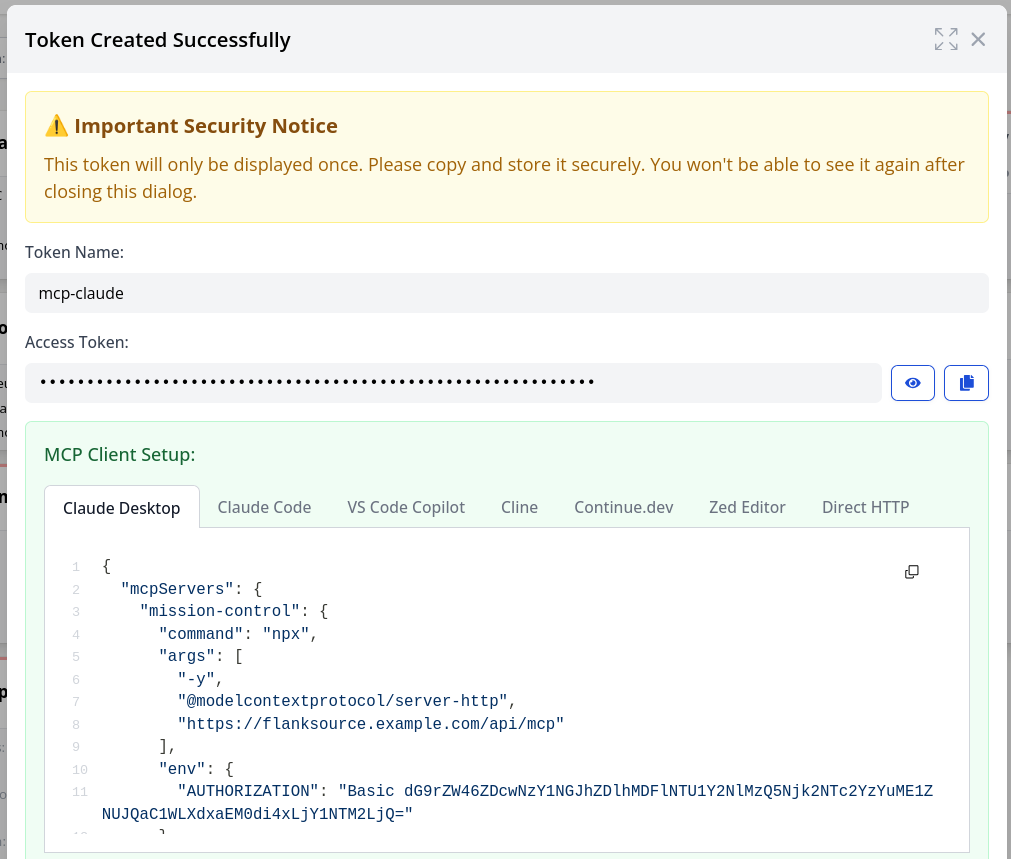
Copy the generated config for your relevant client, or use the token directly
Client Setup Instructions
- Claude Desktop
- Claude Code
- VS Code Copilot
- Cline
- Continue.dev
- Zed Editor
- Direct HTTP
Claude Desktop supports MCP connections through its configuration file.
Setup Steps
- Open Claude Desktop settings
- Navigate to Developer → Edit Config
- Add the Mission Control MCP server:
{
  "mcpServers": {
    "mission-control": {
      "command": "npx",
      "args": [
        "-y",
        "@modelcontextprotocol/server-http",
        "https://mc.<org-id>.workload-prod-eu-02.flanksource.com/mcp"
      ],
      "env": {
        "AUTHORIZATION": "Basic YOUR_TOKEN_HERE"
      }
    }
  }
}
- Restart Claude Desktop
- The Mission Control tools will appear in the tools menu
Claude Code (claude.ai) supports MCP through browser-based configuration.
Setup Steps
- Visit claude.ai
- Click on your profile icon → Settings
- Navigate to Developer → MCP Settings
- Click "Add Server" and configure:
{
  "name": "mission-control",
  "type": "http",
  "url": "https://mc.<org-id>.workload-prod-eu-02.flanksource.com/mcp",
  "headers": {
    "Authorization": "Basic YOUR_TOKEN_HERE"
  }
}
- Click "Save" and refresh the page
- Mission Control tools will be available in new conversations
Alternative Setup (via URL)
You can also connect by visiting:
https://claude.ai/settings/mcp?server=mission-control&url=https://mc.<org-id>.workload-prod-eu-02.flanksource.com/mcp
Then add your authorization token in the settings.
GitHub Copilot Chat in VS Code supports MCP through the Copilot extensibility API.
Setup Steps
-
Ensure you have GitHub Copilot Chat installed in VS Code
-
Install the MCP extension for Copilot:
code --install-extension github.copilot-mcp -
Open VS Code settings (Cmd/Ctrl + ,)
-
Search for "Copilot MCP"
-
Add Mission Control configuration:
{
  "github.copilot.mcp.servers": {
    "mission-control": {
      "command": "npx",
      "args": [
        "-y",
        "@modelcontextprotocol/server-http",
        "https://mc.<org-id>.workload-prod-eu-02.flanksource.com/mcp"
      ],
      "env": {
        "AUTHORIZATION": "Basic YOUR_TOKEN_HERE"
      }
    }
  }
}
- Reload VS Code window
- In Copilot Chat, type
@mcpto access Mission Control tools
Using MCP in Copilot Chat
- Use
@mcp listto see available tools - Use
@mcp mission-control <command>to execute specific tools - Example:
@mcp mission-control query-catalog namespace=production
Cline supports MCP through its settings configuration.
Setup Steps
- Install Cline extension in VS Code
- Open VS Code settings (Cmd/Ctrl + ,)
- Search for "Cline MCP"
- Add Mission Control server configuration:
{
  "cline.mcpServers": {
    "mission-control": {
      "command": "npx",
      "args": [
        "-y",
        "@modelcontextprotocol/server-http",
        "https://mc.<org-id>.workload-prod-eu-02.flanksource.com/mcp"
      ],
      "env": {
        "AUTHORIZATION": "Basic YOUR_TOKEN_HERE"
      }
    }
  }
}
- Reload VS Code window
- Mission Control tools will be available in Cline chat
Continue.dev supports MCP servers through its configuration file.
Setup Steps
-
Open Continue configuration
- Click the gear icon in Continue sidebar
- Or edit
~/.continue/config.jsondirectly
-
Add Mission Control to the
mcpServerssection:
{
  "mcpServers": [
    {
      "name": "mission-control",
      "command": "npx",
      "args": [
        "-y",
        "@modelcontextprotocol/server-http",
        "https://mc.<org-id>.workload-prod-eu-02.flanksource.com/mcp"
      ],
      "env": {
        "AUTHORIZATION": "Basic YOUR_TOKEN_HERE"
      }
    }
  ]
}
- Restart Continue
- Mission Control tools will be available in chat
Zed supports MCP through its assistant configuration.
Setup Steps
- Open Zed settings (Cmd/Ctrl + ,)
- Navigate to Assistant settings
- Add Mission Control MCP configuration:
{
  "assistant": {
    "mcp": {
      "servers": {
        "mission-control": {
          "command": "npx",
          "args": [
            "-y",
            "@modelcontextprotocol/server-http",
            "https://mc.<org-id>.workload-prod-eu-02.flanksource.com/mcp"
          ],
          "env": {
            "AUTHORIZATION": "Basic YOUR_TOKEN_HERE"
          }
        }
      }
    }
  }
}
- Restart Zed
- Mission Control tools will be available in the assistant
For custom integrations or clients that support direct HTTP connections:
Connection Details
- Base URL:
https://mc.<org-id>.workload-prod-eu-02.flanksource.com/mcp - Protocol: HTTP with SSE (Server-Sent Events)
- Authentication: Basic token in Authorization header
Example Request
curl -X POST https://mc.<org-id>.workload-prod-eu-02.flanksource.com/mcp \
  -H "Authorization: Basic YOUR_TOKEN_HERE" \
  -H "Content-Type: application/json" \
  -d '{
    "jsonrpc": "2.0",
    "method": "initialize",
    "params": {
      "protocolVersion": "2024-11-05",
      "capabilities": {}
    },
    "id": 1
  }'
WebSocket Connection
For clients supporting WebSocket:
const ws = new WebSocket('wss://mc.<org-id>.workload-prod-eu-02.flanksource.com/mcp/ws', {
  headers: {
    'Authorization': 'Basic YOUR_TOKEN_HERE'
  }
});

ws.on('open', () => {
  ws.send(JSON.stringify({
    jsonrpc: '2.0',
    method: 'initialize',
    params: {
      protocolVersion: '2024-11-05',
      capabilities: {}
    },
    id: 1
  }));
});
Troubleshooting
Common Issues
-
Connection Refused
- Verify the server URL is correct
- Check if you're behind a firewall or proxy
- Ensure the token has proper permissions
-
Authentication Failed
- Verify token is valid and not expired
- Ensure token has
mcp.*permissions - Check if Basic prefix is included
-
Tools Not Appearing
- Restart the client application
- Check client logs for errors
- Verify MCP server is properly configured
Testing Connection
You can test your MCP connection using the MCP CLI:
npx @modelcontextprotocol/cli connect \
  --transport http \
  --url https://mc.<org-id>.workload-prod-eu-02.flanksource.com/mcp \
  --header "Authorization: Basic YOUR_TOKEN_HERE"
Next Steps
Once connected, explore the available tools:
- Catalog Tools - Query and manage configuration items
- Connection Tools - Manage connections and integrations
- Playbook Tools - Execute and manage playbooks